Essential Ingredients and Equipment for Perfect Fish and Chips
Selecting the best fish for fish and chips is fundamental. Classic choices include fresh cod and haddock, prized for their mild flavor and firm, flaky texture after frying. Alternatives such as pollock or hake also work well, maintaining authentic taste while catering to availability and budget.
For authentic chips, choosing the best potatoes for chips matters greatly. Varieties like Maris Piper or King Edward are ideal due to their high starch content, delivering thick, fluffy chips with a crisp exterior. These potatoes absorb oil evenly and result in perfect texture after frying.
Also to see : What are the tips for making a rich and savory beef Wellington?
When it comes to equipment for frying fish and chips, several essentials ensure success:
- A deep fryer or a heavy-bottomed pot is critical for maintaining stable oil temperature.
- A reliable thermometer helps monitor oil heat precisely; the ideal frying temperature typically ranges between 175°C and 190°C.
- A wire rack allows drained food to stay crispy rather than soggy.
- Long-handled utensils, such as slotted spoons or spider strainers, assist in safely handling delicate fish fillets and chips.
Attention to these ingredients and equipment provides the foundation for consistently excellent fish and chips, setting the stage for flawless preparation and cooking.
Have you seen this : What Are the Secrets Behind Traditional British Dishes?
Preparing the Fish and Chips
Preparing homemade fish and chips starts with properly prepping fish fillets. Begin by patting the fish dry with paper towels to remove excess moisture, which ensures the batter adheres evenly and fries to a crispy finish. Next, portioning the fillets into manageable sizes promotes consistent cooking, preventing underdone centers or overcooked edges.
When prepping potatoes for chips, cutting them into thick, uniform strips is crucial. This shape helps achieve the classic fluffy interior and crisp exterior sought after in perfect fish and chips. After cutting, soak the potatoes in cold water for at least 30 minutes. This step removes surface starch, reducing the risk of soggy chips while enhancing crispiness. Draining and thoroughly drying the potatoes before frying is equally important to avoid oil splatter and moisture retention.
Expert advice points to controlling moisture at every stage. For instance, removing excess water from fish and potatoes before cooking directly influences the texture and overall quality of the dish. By carefully preparing these fish and chips ingredients, you lay the groundwork for frying that produces consistently excellent results.
Mastering the Batter and Coating
Creating the perfect crispy fish batter begins with using cold ingredients—cold water or beer enhances the batter’s lightness. Incorporating carbonation, such as sparkling water or beer, introduces air bubbles, which further contributes to a delicate, airy crust. A typical fish batter recipe blends flour, baking powder for leavening, and seasoning. Avoid overmixing; a few lumps keep the texture tender rather than dense.
For coating techniques, dry the fish thoroughly before dipping it into the batter. This step is crucial—moisture hinders batter adhesion. Lightly dusting the fish with flour before battering helps the batter cling evenly, preventing patchy coverage. Immerse the fish fully so all sides receive the coating, ensuring an even crust after frying.
Maintaining batter consistency is key. If it’s too thick, the coating may be heavy and doughy; too thin, it won’t hold properly. Aim for a smooth, pourable batter. After frying, immediately place fish on a wire rack instead of paper towels to keep the crust crisp and avoid sogginess.
Master these fish batter recipe tips and coating techniques to achieve a crispy fish batter that stays crunchy, delivering authentic and delicious fish and chips every time.
Frying Techniques for Restaurant-Quality Results
Achieving perfect frying fish and chips hinges on controlling the oil temperature for fish and chips. Maintaining the oil between 175°C and 190°C is essential; a reliable thermometer ensures this precision. If the oil is too cool, the batter absorbs excess oil, leading to soggy, greasy results. Too hot, and the coating burns before the fish and chips cook through.
For ultimate crispiness, employ the double frying chips method. First fry the potatoes at a lower temperature (around 130°C to 140°C) until tender but not browned. After draining and cooling, fry again at the higher temperature (180°C to 190°C) to create a golden, crisp exterior. This technique reduces sogginess by sealing the chip’s surface, locking in moisture within.
When frying fish, immerse the battered fillets fully and avoid overcrowding, as this drops the oil temperature and causes uneven cooking. Use long-handled utensils to gently turn and retrieve fish and chips, preventing batter damage. Always drain fried items on a wire rack to keep them crisp, not on paper towels, which trap steam and soften textures.
These frying fish and chips techniques guarantee a restaurant-quality crunch and texture, ensuring every batch is as crispy and delightful as traditional British fish and chips.
Serving, Sides, and Expert Finishing Touches
Serving fish and chips at their peak crispness requires careful handling after frying. Always drain fried items on a wire rack rather than paper towels. This prevents steam buildup that softens the crispy batter and chips. Keeping food warm without losing crunch is easier when allowing excess oil to drip away freely.
Classic sauces for fish and chips elevate the experience. Homemade tartar sauce combines mayonnaise, pickles, lemon juice, and herbs, offering a tangy complement to the crispy fish batter. Malt vinegar, a traditional British accompaniment, cuts through the richness of fried foods, balancing flavor and texture effectively.
Popular fish and chips sides include mushy peas—a comforting, vibrant dish that adds color and a mild sweetness to plate. Other sides like coleslaw or pickled onions introduce contrasting textures and flavors, enhancing every bite.
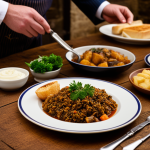
Presentation matters: stacking chips beside the battered fish fillet and adding lemon wedges both improves visual appeal and allows diners to adjust acidity. Small details like fresh parsley and neat plating can turn homemade fish and chips into a restaurant-quality meal, making serving an essential final step in the fish and chips process.
Common Mistakes and Troubleshooting Tips
A frequent fish and chips mistake is soggy batter caused by improper moisture control. Ensure fish is fully dried before battering; excess water prevents the batter from adhering properly, resulting in a limp coating. Similarly, insufficiently dried potatoes lead to greasy chips, as surface moisture causes oil to splatter and soak in.
Uneven frying often stems from overcrowding the oil. Placing too many pieces simultaneously drops the oil temperature, causing uneven cooking and clumping. Use a thermometer to maintain the oil temperature for fish and chips between 175°C and 190°C. This range ensures batter crisps quickly without burning and chips cook through evenly.
Common crispy batter tips include avoiding overmixing the batter to preserve its light texture and immediately draining fried fish on a wire rack rather than paper towels. Paper towels trap steam, softening the crisp crust.
For troubleshooting clumping or batter falling off, lightly flour fish before dipping into the batter, ensuring better adhesion. If chips turn soggy post-frying, double frying or thorough drying prior helps seal their surface for lasting crispness.
These essential fixes and attention to detail ensure consistent, repeatable results when making homemade fish and chips.